Friday, May 16, 2014

Korean Seafood Vegetable Pancakes


When I was younger I always hated pancakes.  I don't mean the way you hated everything because you were a little punk kid either, I legit couldn't get far enough away from them.  The smell of them cooking made me nauseous. TMI?  I was kind of a weirdo haha.  Then I remember having these at a friends house and absolutely loving them; it's possible that these are what opened me the world of pancakes.  You see these don't really taste anything like normal pancakes, they are savory and crispy, and just overall wonderful.  I am just now coming out of sort of a creative food rut and the idea of making these popped into my head.  I looked online for recipes of them that I could eat, but I didn't find any.  That kind of made me even more excited because I realized I had the opportunity to share this recipe with all of those with the same food allergies as me that would absolutely love these. They are really delicious and addictive and just a warning this recipe makes a loooottt of batter, but the batter keeps fine in the refrigerator for a few days (I've been eating them for lunches).  Also if you make them, MAKE THE DIPPING SAUCE, seriously serious like caps lock serious because it takes them from good to great.

K O R E A N  S E A F O O D  V E G E T A B L E  P A N C A K E S  R E C I P E

Ingredients 
Pancakes
☂ 5 cups all-purpose gluten free flour (I used Bob's Red Mill)
☂ 2½ cups water
☂ 6 Tbsp. water
☂ 3 Tbsp. olive oil
☂ 2 Tbsp. baking powder
☂ ½ tsp. salt
☂ 1 lb. bay shrimp (these are small shrimp that come cleaned and cooked)
☂ 2 medium zucchini, cut into matchsticks
☂ 5 green onions, roughly chopped
☂ 2 medium carrots, shredded
☂ 4 garlic cloves, finely minced
olive oil to cook pancakes

Dipping Sauce
☂ 4 Tbsp. tamari (gluten free soy sauce)
☂ 2 Tbsp. vinegar
☂ 1 Tbsp. sugar
☂ 1 Tbsp. water

Directions
☂ In a small bowl mix together 6 Tbsp. water, 3 Tbsp. olive oil, and 2 Tbsp. baking powder (these ingredients act as an egg replacement).
☂ In a large bowl mix together gluten free flour, 2½ cups water, salt, and the egg replacement mixture from step one.
☂ Now fold in the shrimp and vegetables. (This batter isn't extremely thick so don't be alarmed, that's how it's suppose to be!)
☂ Heat a non-stick pan to medium high heat and drizzle in a little olive oil and wait until the pan is hot.  
☂ With the batter, spoon in a few thin miniature pancakes (if you make them too big it is hard for them to cook all the way through without burning on the outside).  When they have browned on one side drop the heat to medium and flip them over and cook until they are completely cooked through (this takes roughly 4 minutes).  If they start to burn at any point just turn the heat down!
☂ While these are cooking you can mix together the dipping sauce ingredients!
☂ These can be served hot or cold, but I would recommend if you have extra batter, rather than cooking it all up, save the batter and cook these pancakes individually.  They will get somewhat soggy if they are refrigerated after being cooked!
☂ WALAH!  Enjoy and start feeling nourished


Thursday, May 15, 2014

Honey Mustard Dressing


Everyone who cooks has a thing that they feel like they are particularly good at (a niche), for me that is sauces.  I love to make sauces because a sauce can completely transform a boring dish.  Sauces are something you can totally wing on the spot with what you have on hand and they are also very forgiving.  Dressing falls into that sauce category for me, so it is also something I love to make.  I honestly don't know why anyone buys bottled dressing because for one they are so easy to make and they are a lot more delicious homemade, but you can also make them a lot healthier and avoid the chemicals they use in preserving dressings.  Dressings are also particularly quick to whip up and you can totally tailor it to what you love.  When I ate eggs I would mix some of this honey mustard dressing into mayonnaise and a little bit of water and it would make the most delicious creamy dressing.  This dressing can be used for a lot of things though; a sauce for chicken, dipping sauce for veggies, or just traditionally over a salad.  I personally like vegetables, but if I''m going to eat a big salad it has got to have a tasty dressing on it and this totally fits the bill.  

H O N E Y  M U S T A R D  D R E S S I N G     R E C I P E

Ingredients
☂ 4 Tbsp. whole grain mustard (it is essential that it is whole grain because it is a milder mustard and a lot more flavorful)
☂ 3 Tbsp. olive oil
☂ 4½ Tbsp. honey
☂ ¼ tsp. black pepper
☂ ½ tsp. salt
☂ 3 Tbsp. water
☂ pinch of cayenne pepper

Directions
☂ Place all ingredients together in a food processor and blend for about 1-2 minutes.  
☂ Taste dressing and adjust seasonings to your liking!
☂ This recipe makes about 1 cup of dressing.
☂ WALAH!  Enjoy and start feeling nourished

Tuesday, May 13, 2014

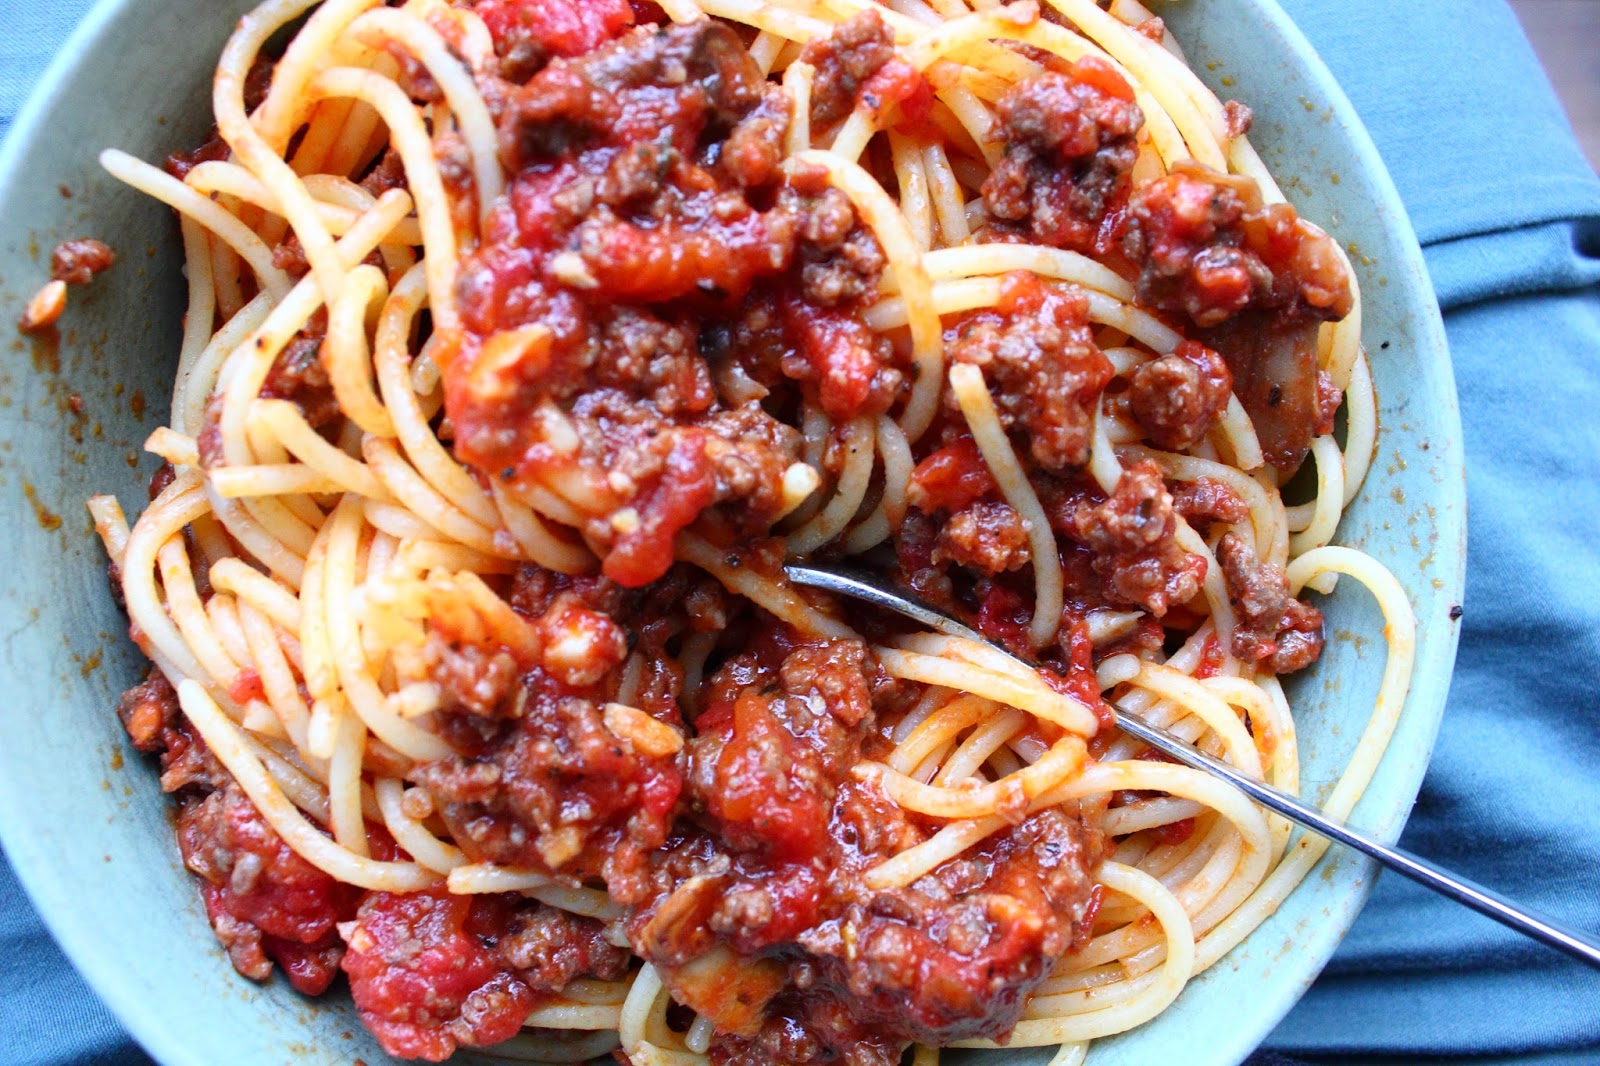
Italian Meat Sauce


Long time no post, and honestly it's for many reasons.  I've kind of had a creativity block, but also I've just been busy.  Life happens and if you don't make the time SUPRISE! it doesn't get done.  There's my excuse, but who really cares.  I'm going to put more effort in because I want to and that will be that.  

This recipe stems from a sort of confusion.  I couldn’t understand why sauces at Italian restaurants tasted so much better than my own.  I mean it’s just a simple tomato sauce, how could there be such a difference of flavor.  I had a feeling that it was something that I could actually make, and being gluten free it is a lot easier to eat Italian food when I make it at home because I can make my own noodles (I will hit on the noodles subject again to give you my recommendation of good gluten free noodles).  I searched the internet to try and figure out ways that I could make my sauces taste more like theirs, and that is how I formed this recipe.  The tips I learned were more garlic (much more garlic) and more olive oil and it pretty much transformed my sauce game.  It was simple which is sort of crazy and sort of great.  I can tell you one thing, this is one of my favorite smells in the whole wide world when it’s cooking. 

Just briefly (clearly not so briefly haha) I want to touch on the noodles.  If you are gluten free like me then you have probably tried many different gluten free noodles.  I myself, have tried brown rice noodles, corn noodles, quinoa noodles, etc.  until I found the perfect noodles.  The best part is they are inexpensive and very easy to find (pretty much at most grocery stores).  They are the Barilla gluten free noodles.  At first I was skeptical because it was a big brand and I just tend to be skeptical of big brands making gluten-free, but these have been my favorite for a while now.  They taste exactly like regular wheat pasta and I believe it is because they are made up of a blend of rice and corn.  It makes sense because most of the good baked goods and breads that are gluten free are made up of a blend of different flours.  It is easier to get the right taste and texture with a blend.  So if you’re making an pasta recipe, give these noodles a try.  Even if you're not gluten free, I would recommend them as a healthier alternative, my whole family (which all eat gluten)  ate these and didn’t notice the difference.


I T A L I A N  M E A T  S A U C E  R E C I P E

Ingredients
☂ 2 (28 oz.) cans of whole plum tomatoes in tomato juice
☂ 1 lb. ground beef (90% or leaner!)
☂ 12 garlic cloves, thinnly sliced
☂ 3 cups sliced crimini mushrooms
☂ 1 lb. gluten free Barilla spaghetti 
☂ ¼ cup olive oil
☂ 1 tsp. salt
☂ ½ tsp. black pepper
☂ 1 Tbsp. sugar
☂ 1 tsp. dried basil
☂ ¼ cup reserved pasta water
☂ salt, pepper & sugar to taste

Directions
☂ Place large pot on stove and add in olive oil and garlic.  Once the olive oil and garlic are in the pot turn the stove to medium low heat.  Cook garlic for 10-15 minutes until it becomes golden.  
☂ Add in both cans of tomatoes and turn the heat up to high heat.  Mix in 1 tsp. salt, ½ tsp. black pepper, 1 Tbsp. sugar, and 1 tsp. dried basil to season.  Let cook on high for 20 minutes then drop the heat to medium low.  
☂ While the sauce is cooking on high, heat another skillet to medium and cook ground beef until browned and fully cooked.  Season with salt and pepper.  
☂ Once the meat is cooked drain it (saving 1 Tbsp. of meat drippings in the skillet) and add the meat to the sauce which should now be on medium low.  
☂ In the skillet with the meat drippings drizzle in 1 tsp. of olive oil and turn the heat to high.  Add in the sliced crimini mushrooms and let them cook on one side until they are browned before flipping them to cook on the other side.  Add in salt and pepper to taste once the mushrooms have browned.  
☂ Once the mushrooms are cooked stir them into the pasta sauce.
☂ While the sauce continues to simmer (turn it down to low if there is any burning on the bottom), boil a large pot of water to cook the pasta in (sprinkle in about ½ tsp. salt).
☂ Once the water comes up to a boil cook the pasta according to the package directions (make sure to reserve 1/4 cup of pasta water once the pasta is cooked to add into the sauce.)
☂ Drain the pasta and add 2 Tbsp. to ¼ cup of pasta water to the sauce and check the sauce for seasonings (salt, black pepper, sugar, and dried basil).  
☂ Serve the tomato sauce with the pasta! 
☂ WALAH!  Enjoy and start feeling nourished

Monday, April 21, 2014

Red Wine Balsamic Pot Roast


Pot roast is something that I feel is very personal to me.  When I created this recipe it wasn't based off of or really inspired by anything that I had seen or looked for.  I started making this a couple years ago and ever since it has been one of the best foods for me to have when I am a little meat crazed and need some comfort.  It will make you smile and your belly happy.  I know for a fact it is one of the best things that I make.  The way that I like to make pot roast is a little different than the traditional way and I don't like to cook my vegetables inside the liquid because I don't really tend to like mushy vegetables.  Also I should note that in my experience cooking roast I prefer to cook it on the stove top rather than the oven because I find it becomes more tender.  This recipe is a great recipe if you want to make something impressive, but don't really want to put a lot of fuss into cooking.  Enjoy!


R E D  W I N E  B A L S A M I C  P O T        R O A S T  R E C I P E


Ingredients 
☂ 2½ lb. chuck roast
☂ 1 tsp. salt
☂ 1 tsp. black pepper
☂ ½ Tbsp. olive oil
☂ 1 cup red wine
☂ ¾ cup balsamic vinegar 
☂ 14 cups water
☂ 2 Tbsp. Organic Beef Better Than Bouillon (if you don't have this variety then you may just use 6 cups of beef broth and 8 cups of water)

Directions
☂ Cut roast in half width wise and sprinkle generously with salt and pepper on each side of both pieces.
☂ Heat large pot to medium high heat and add in olive oil and roast.  
☂ Brown roast on all sides.
☂ When all the meat has browned on each side add in red wine, balsamic, water, and beef bouillon.  Give everything a mix and turn the heat to high.
☂ Once the pot has come to a vigorous boil, turn the heat down to medium low (around 2 or 3 setting).  Place a lid on top of the pot and cook for 2½ hours. 
☂ When the meat is cooked take it out and shred it and moisten with the liquid from the pot.
☂ You can serve this with mashed potatoes, a baked potato, asparagus, cooked carrots, or whatever your heart desires :)
☂ WALAH!  Enjoy and start feeling nourished


(just wanted to share a photo of the pretty cherry blossoms that are blooming everywhere around here!)


Thursday, April 10, 2014

Southwest Citrus Chicken Marinade


So the weather is getting a little warmer and I'm craving more fresh and bright flavors.  A good marinade can change everything (YES EVERYTHING!)  I'm serious though, I think marinading meat is one of the best ways you can make sure what you're making is going to come out straight up delicious.  What I like about this marinade is that it is really healthy and fresh because there is no oil in it.  It's great for those who are looking to eat healthier and don't want to skip out on good tasting food (like everybody).  I like to serve this chicken it tacos, burrito bowls, or even on a southwest inspired salad!


S O U T H W E S T  C I T R U S  C H I C K E N  M A R I N A D E  R E C I P E

Ingredients
☂ 1½ lbs. chicken tenders
☂ 1 Tbsp. orange zest
☂ olive oil

Marinade
☂ ¾ cup of fresh squeezed orange juice (make sure to use delicious oranges and this will take around 3 oranges)
☂ 6 garlic cloves
☂ 1 chipotle pepper (from a can of chipotle peppers in adobo sauce)
☂ 1 cup of cilantro (it's okay if there are some stems included)
☂ 1 tsp. black pepper
☂ 2½ tsp. salt

Directions
☂ Place all marinade ingredients together in a food processor and blend until smooth (it will take about 2-3 minutes).
☂ Place chicken tenders in a large bowl and pour marinade into the bowl.  Mix the marinade together with the chicken until all the chicken is well coated.
☂ Cover the bowl and you can marinade the chicken on the counter for an hour or in the refrigerator for up to 10 hours.  
☂ After marinating (I typically just do an hour of marinating), heat up a large pan on medium-high heat and drizzle in a little olive oil.  Then place in about half of the chicken tenders (place as many as will fit in a single layer) and give each tender a little shake before adding it into the pan so the chicken in the pan isn't swimming in marinade.  
☂ Cook the chicken tenders for about 4-5 minutes on one side (flip when the chicken starts to brown), and then for about 2 minutes on the other side.  (Just cut one chicken in half to make sure they're cooked through before removing from the pan).  Repeat this cooking method with the remaining chicken.  Also, if you notice the chicken is burning a bit just turn down the pan to medium heat. 
☂ When all the chicken is cooked, top it with the orange zest to give it an extra fresh flavor!
☂ WALAH!  Enjoy and start feeling nourished


Monday, April 7, 2014

Sloppy Joes


I can't help but think about summer camp when I think of sloppy joes.  I use to really look forward to them because I never had them any other time of year.  They also remind me of this scene in the Olsen twins movie It Takes Twohttps://www.youtube.com/watch?v=u3jBWs5oR08 when one of the Olsen twins eats a sloppy joe for the first time and calls it a "big gooey messy burger" haha.  I use to be obsessed with the Olsen twins and always thought Mary-Kate was the coolest (I mean she was right? Kinda tom boyish and sportier haha!)  Anyways back to the sloppy joes, this is sort of a healthier version, but with all the same familiar flavors.  You can pack a lot of veggies in this meal without feeling like you're eating them if that makes sense.  My favorite way to serve these sloppy joes is over some gluten free cornbread, but they're also good in corn tortillas and tortilla chips!


S L O P P Y  J O E S  R E C I P E


Ingredients
 2 lbs. ground beef (I use at least 90% lean)
 6 celery stalks, chopped
 2 onions, diced
 2 green bell peppers, chopped
 1 (15 oz.) can of tomato sauce
 2½ Tbsp. corn starch
 3 Tbsp. brown sugar
 ¾ cup ketchup 
 4 Tbsp. yellow mustard
 salt and pepper to taste

Directions
 Heat a pan to medium heat and add in your ground beef.  Cook the beef until it is all the way cooked through and add it with a slotted spoon (so not to transfer the remaining fat in the pan) to a slow cooker on HIGH (4 hour) setting.
 In the pan that cooked the ground beef remove all the remaining fat except two tablespoons.  The remaining two tablespoons will be used to cook the vegetables.
 Add celery, onions, and green bell peppers to the pan.  Season with salt and pepper.  Saute until they begin to soften and then transfer them to the slow cooker with the ground beef.  
 To the slow cooker add the remaining ingredients and give it all a mix until everything is incorporated and make sure to put the lid on the slow cooker.  
 Let the sloppy joes cook in the slow cooker for 2½-3 hours, making sure to stir them every 30 minutes so the sides don't burn.  
 Serve with gluten-free cornbread, tortilla chips, gluten-free bun or whatever your heart desires!
☂ WALAH!  Enjoy and start feeling nourished


Wednesday, April 2, 2014

Flank Steak Fajita Marinade


I was just telling my Dad yesterday that in my next life I would like to be born in Mexico.  I hope that can be arranged because I am seriously a little bit Mexican food crazy.  And when I say a little bit I almost always mean a lot.  I would seriously love to have an amazing Abuelita to teach me all her secret recipes, but for now I'm just doing my best.  I'm a pretty big fan of tender meat (as I would think most people are) and usually marinade it when I want that soft texture.  This marinade is fast to make and you only need to marinade your steak for about an hour.  There is nothing worse to me then spending the money on flank steak and ending up chewy and unflavorful meat.  Please don't make that mistake.  This recipe is easy and pretty foolproof.  Plus it just makes some pretty damn good fajitas.  So enjoy!


F L A N K  S T E A K  F A J I T A             M A R I N A D E  R E C I P E

Ingredients
☂ 1½ lbs. flank steak
☂ olive oil

Marinade
☂ 1 cup of red onion, roughly chopped
☂ 2 tsp. cumin
☂ zest of 1 large lime
☂ 4 garlic cloves
☂ 4 Tbsp. olive oil
☂ 1 tsp. salt
☂ 2 chipotle peppers (from a can of chipotle peppers in adobo sauce)
☂ 2 tsp. adobo sauce (from a can of chipotle peppers in adobo sauce)

Directions
☂ Place all marinade ingredients together in a food processor and blend until smooth (takes about 2 minutes).
☂ Take your flank steak and slice it in thin slices AGAINST THE GRAIN [this is very important or you will get tough meat].  
☂ Place meat in a large bowl and pour in marinade.  Mix the marinade well with the beef and cover.  I leave my meat on the counter and let it marinade for an hour and then begin to cook.  If you wish to marinade your meat any longer than an hour make sure to refrigerate it!  When you are ready to cook it pull it out and let it sit for 15 minutes so that it isn't cold when you cook it because that can make it tough.  You can marinade the meat for up to 24 hours in the refrigerator.  
☂ So after an hour I heat a pan to medium high-heat and drizzle in a little bit of olive oil.  Then I add in half of the flank steak and let it cook on one side until it slightly browns and then I flip it over and let it cook for another minute until it is cooked through (be careful to not overcook).  Then repeat this and cook the rest of the meat. 
☂ To serve with this flank steak fajita meat I often make cilantro-lime rice, sauteed red onions and green bell peppers, salsa, guacamole, corn, and black beans.  But serve this with whatever you like, it also makes great tacos and burritos.  
 WALAH!  Enjoy and start feeling nourished