Thursday, December 4, 2014

Pumpkin Spice Muffins


I've been on a little bit of a baking kick recently.  I think being gluten free you are going to come across times when you just really want some delicious baked goods.  They are so hard to find (especially when gluten isn't the only thing you avoid) so the best and cheapest solution is usually to make it yourself.  I refer to these as the anti depression muffins which might seem a little bit dark, but I've heard that pumpkin seeds help with depression.  Seeing as here in Seattle we are entering into the dark days with plenty of rain and clouds (which tends to make most people a little bit down) I though that this was the perfect time to make this recipe to help perk people up.  


P U M P K I N  S P I C E  M U F F I N       R E C I P E

Ingredients
☂ 2 cups gluten free flour (I use Bob's Red Mill)
☂  cup & 2 Tbsp pumpkin seeds, shelled
☂ 2 tsp. baking powder
☂ ½ tsp. baking soda
☂ 1½  tsp. cinnamon
☂  tsp. nutmeg
☂ sprinkle of ground cloves
☂ ¼ tsp. ground cardamom
☂ ¾ cup pure pumpkin puree
☂ 1 Tbsp. vanilla extract
☂ 1 cup soy milk
☂ ¾ cup brown sugar

Directions
☂ Preheat oven to 375 F.
☂ Line a muffin tin with 12 muffin liners.  
☂ Combine all ingredients together (except for the 2 Tbsp. of pumpkin seeds) in a bowl and mix thoroughly as you go.  When the mixture is all combined distribute it evenly throughout the 12 muffin cups. 
☂ Top the muffins evenly with the 2 Tbsp. of pumpkin seeds. 
☂ Bake for 20 minutes or until a toothpick comes out clean when stuck inside a muffin. ☂ WALAH! Enjoy and start feeling nourished

Tuesday, November 11, 2014

White Bean and Kale Penne Pasta with Italian Sausage


You can't get much better than a nice hearty pasta in the fall time.  In the fall I always want to eat "cozy food" which I guess is just any meal that fills you up and leaves you feeling warm inside.  That is probably kind of corny, but it's how I really feel, so there you go.  This pasta dish is great because you are getting a lot of protein from the beans and meat to help keep you full.  It also highlights kale, which is in season and at it's best in the fall.  If you are thinking to yourself "but I don't like kale" I seriously challenge you to try this dish and see if it can change your mind.  This is a quick meal to throw together and has some really delicious bold flavors!


W H I T E  B E A N  A N D  K A L E          P E N N E  P A S T A  with  I T A L I A N  S A U S A G E

Ingredients
☂ 1 lb. Gluten Free Penne Pasta (I use Barilla)
☂ 8 garlic cloves
☂ ¼ cup olive oil
☂ ½ lb. crimini mushrooms, sliced
☂ 1 lb. ground Italian sausage (the kind not in the casings)
☂ 1 bunch of kale
☂ ¾ cup white wine
☂ 1½ cups chicken stock
☂ ½ cup of pasta water
☂ 1 can great northern beans, drained & not rinsed

Directions
☂ Cook pasta according to package directions and drain (reserving ½ cup of pasta water) and set aside.
☂ In a large soup pot add in olive oil and garlic and then turn the heat to medium low. ☂ Let the garlic cook until golden brown and then add the sausage. 
☂ Break up the sausage into bite size pieces and cook until almost all the way cooked through and then add the mushrooms. 
☂ Begin preparing the kale by ripping the leaves off of the stem in the center of the kale.  Wash the kale leaves and then begin to tear the leaves into smaller pieces while squeezing and massaging the kale (this helps the kale become super tender and delicious).
☂ Take an additional pot and turn it to high and add the white wine, chicken stock, and pasta water.  Let the liquids come to a boil and then add kale and cook for 10 minutes.  
☂ Add the white beans to the sausage mixture and let this continue to cook until the kale mixture is done.  
☂ Add the kale mixture to the sausage mixture and now add the penne pasta.
☂ Let the pasta warm through and then serve.
☂ WALAH! Enjoy and start feeling nourished


Saturday, October 11, 2014

Carrot Apple Muffins


I have a serious question...is there anybody who doesn't like muffins?  I mean seriously, they are just the best and definitely what I think of when I think of a quick and yummy fall breakfast.  If you want to buy one dairy, gluten, egg free muffin at the store, first of all good luck finding one, and secondly it's going to cost you.  I believe they are around 5 dollars at whole foods (ridiculous).  I have good news for you though, these are easy and a lotttttt more inexpensive to make!  The great thing about muffins is that you can freeze the whole batch (once they're baked) and just heat up each one as you need them.  These are full of good things for you and are quite filling.  I have tested this recipe many times (trust me I have used any excuse to make these) so I know it's a keeper :)


C A R R O T  A P P L E  M U F F I N S       R E C I P E

Ingredients
(MAKES 12 MUFFINS)
☂ 1¾ cup of All-Purpose Gluten Free flour (I use Bob's Red Mill)
☂ ¾ cup brown sugar
☂ 2 tsp. baking powder
☂ ½ tsp. baking soda
☂ 1½ tsp. cinnamon
☂ ½ tsp. ground cardamom
☂ ⅓ cup golden raisins
☂ ½ cup shredded apple
☂ ½ cup shredded carrot
☂ ¾ cup soy milk (or whatever milk alternative you favor)
☂ 3 Tbsp. vegetable oil

Directions
☂ Preheat oven to 375F and line a muffin tray with 12 liners.
☂ Mix all ingredients together in a bowl and then divide evenly into muffin cups.  
☂ Bake for 20 minutes and enjoy!  They are the most delicious when they are warm, so even if you aren't eating them right after they have been baked I suggest popping them in the microwave for a few seconds to warm them up!
☂ WALAH! Enjoy and start feeling nourished

Sunday, September 28, 2014

Chai Spiced Pumpkin Steamer


Long time no blog!  I took a little summer break from my blog and am so thrilled to be back and be back during my favorite season.  My god, fall I have missed you so much and have been eagerly waiting for you with open arms.  With fall comes the pumpkin craze and I'm totally on board for that, my only complaint with it is fake pumpkin flavoring.  I'm just not about that life, and pumpkin has so many health benefits like helping immune health which is so necessary in this season.  So I bring you my favorite cozy fall beverage and hope that it can make this amazing season even better!


C H A I  S P I C E D  P U M P K I N         S T E A M E R  R E C I P E

Ingredients
☂ 1 cup organic soy milk
☂ 3 Tbsp. pure pumpkin puree (none of that pumpkin pie filling stuff!)
☂ 2 Tbsp. brown sugar
☂ ¼ tsp. cinnamon
☂ ⅛ ground cardamom 
☂ 2 dashes of nutmeg
☂ 1 dash of ground cloves

Directions
☂ Place small pot on stove and heat to medium high heat.Add all ingredients to the pot and whisk together.  
☂ Continue to whisk until it comes to a boil and then let it boil for around 30 seconds.
☂ Place in your favorite mug and relish in this little piece of fall.
☂ WALAH! Enjoy and start feeling nourished


Tuesday, July 8, 2014

Louisiana Jambalaya

I am currently writing this at 5:30 AM and just looking at the pictures of this dish is making me salivate.  Okay and I'm not saying it's the prettiest dish I've ever made, but it is so flavorful and oh gosh I'm craving it.  I'm going to try to resist eating leftovers until lunch when it's socially acceptable!  I've mentioned before that I have family in the south so I feel pretty connected to southern food.  I have also mentioned before that just because you're making some southern comfort food doesn't mean it has to be full of fat.  I think this recipe is a great way to get all the flavor and skip a lot of the fat.  Ultimately you want food that tastes good, but also makes you feel great.  This dish has some good heat to it, and if it were a few years ago this would be too spicy for me, but I'm growing up and learning how to eat hot food haha and enjoying it.  It is also nice because it's a one pot meal and is a pretty simple and straight forward recipe. 


L O U I S I A N A  J A M B A L A Y A           R E C I P E

Ingredients 
☂ 13.3 oz. package of mild chicken Italian sausage (not in casings)
☂ 3 Tbsp. olive oil
☂ 2 green bell peppers, chopped
☂ 2 onions, chopped
☂ 1 jalapeno, seeded and minced
☂ 6 garlic cloves, thinly sliced
☂ 5 green onions, minced
☂ 1 Tbsp. creole seasoning (I use the Tony Chacheres's the Original Creole Seasoning)
☂ 1 tsp. oregano
☂ 2 bay leaves
☂ 2½ cups long grain rice, rinsed
☂ 2 Tbsp. tomato paste
☂ 3 1/2 cups chicken stock
☂ 16 oz. can of diced tomatoes

Directions
☂ Heat large soup pot to medium heat and add in bell peppers, onions, jalapeno, garlic, green onions, creole seasoning, oregano, and bay leaves.  Put a lid on the pot and cook for 15 minutes.  Give it a stir every five minutes.  
☂ Add rice to the pot.  Stir and let it cook for a few minutes until the rice has toasted a bit (this ensures that the individual grains of rice stand out and don't become mush).  
☂ Add tomato paste, diced tomatoes, chicken stock, and break up sausage into the pot.  Give everything a good stir and turn the heat to high.
☂ Once it comes to a full simmer, turn the heat to low and cover with a lid.  Cook for about 45 minutes, and stir it a few times once it's been cooking for 30 minutes so that the bottom rice doesn't burn.
☂ When the rice is cooked and the liquid is absorbed it's ready to eat!
☂ WALAH!  Enjoy and start feeling nourished
\

Wednesday, June 25, 2014

Slow Cooker Pulled Pork

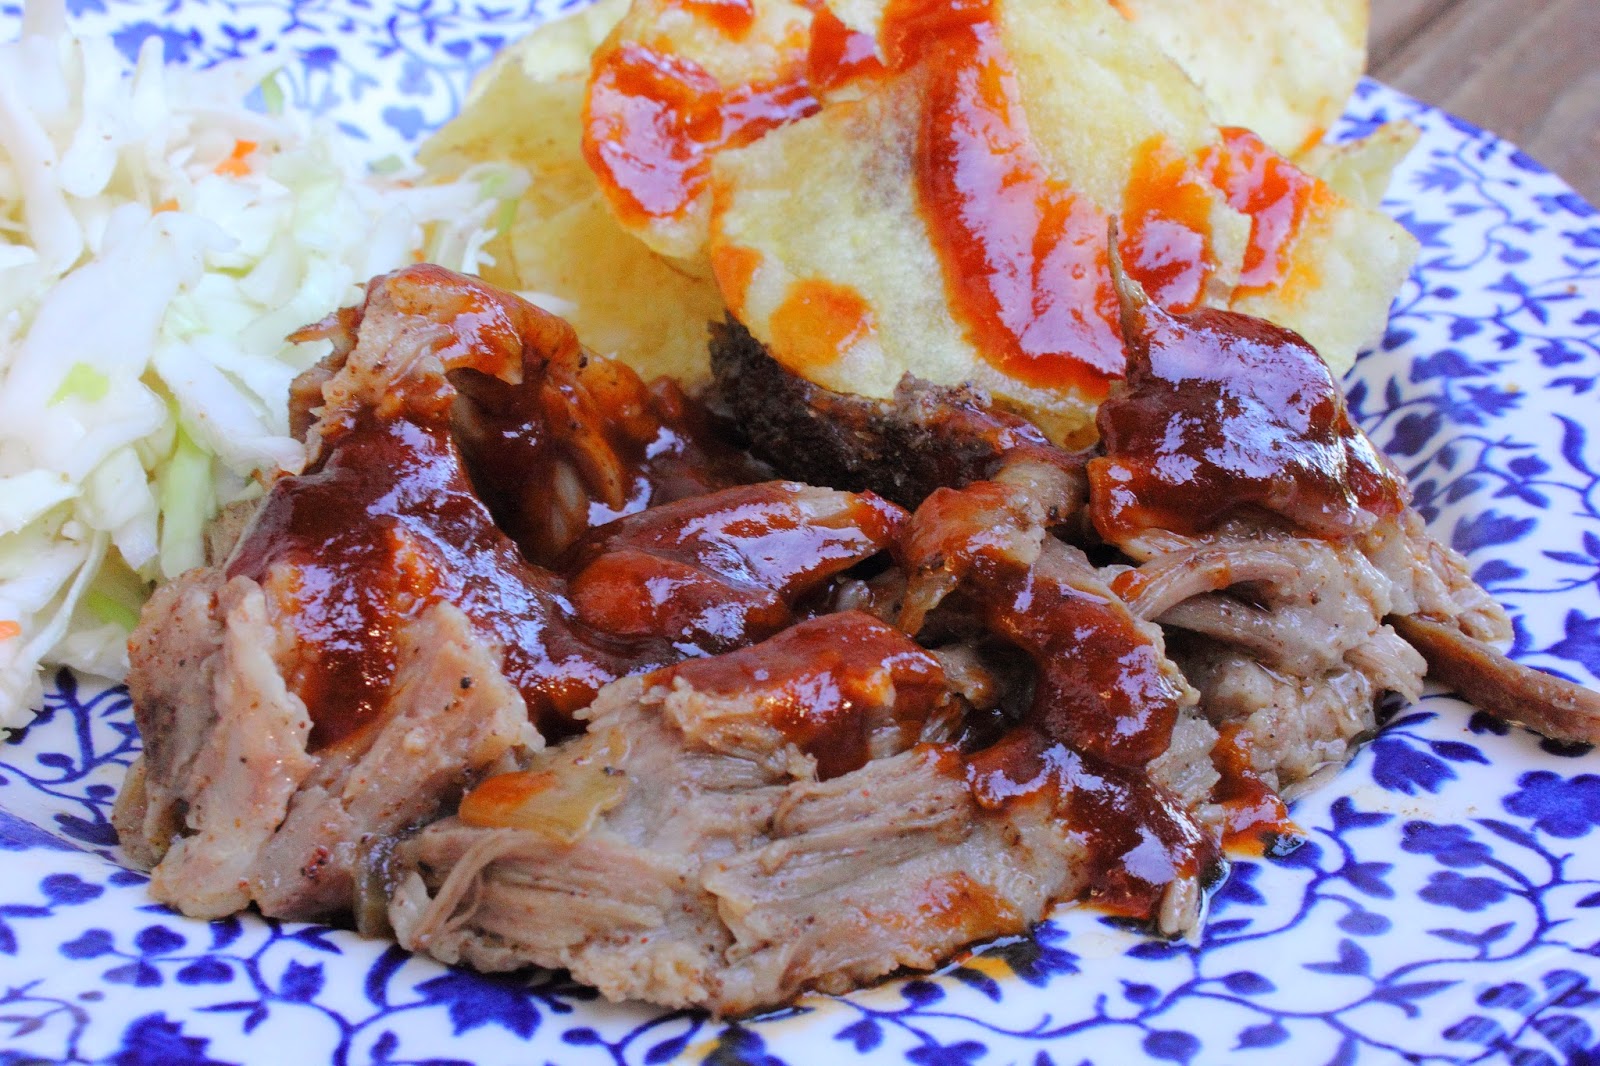
Until you've made pulled pork, you think that it's something quite time consuming and special.  And hey, I'm not saying that it's not a thing of beauty, but it's reeeallll easy to make.  Probably one of the easiest things that I make.  I will also warn you that you shouldn't probably go making this every week because it isn't the healthiest of meals, but it is a nice treat every once in a while.  This recipe is also amazing if you're having company because it feeds a lot of people at a good price and it's one of those things that you can set it and forget it (correct me if I'm wrong, but that was a line from an infomercial once upon a time, no?)  Anyways not much to say about this one except it is delicious and pretty hard to screw up, so it's great for beginners and a great way to cook during the summer that isn't going to heat your whole house up!

S L O W  C O O K E R  P U L L E D  P O R K    R E C I P E

Ingredients
☂ 4-5 lb. pork shoulder
☂ 2 Tbsp. brown sugar
☂ ½ Tbsp. cumin
☂ 1 tsp. cinnamon
☂ 1 Tbsp. garlic powder
☂ 1½ Tbsp. chili powder
☂ 1½ Tbsp. salt
☂ 1 tsp. coriander
☂ 1 Tbsp. paprika
☂ 1 tsp. black pepper
☂ 2 red onions, thinly sliced
☂ 1 cup low-sodium chicken broth

Directions
☂ Heat slow cooker to the 6 hour high heat setting or the 8-10 hour low heat depending on how long you wish to cook it (it becomes more tender when you cook it on low for a longer amount of time.)
☂ Place onion slices and chicken broth at the bottom of the slow cooker to act as a bed for the pork shoulder.
☂ Mix all the seasonings and spices together in a bowl and pat them onto the outside of the pork shoulder, completely covering it.
☂ Place the pork shoulder in the slow cooker and sprinkle any remaining spices over the pork and the onions.  
☂ Put the lid on top of the slow cooker and cook for 6 hours of high or 8 to 10 hours on low.
☂ While the pork is cooking you can whip up some homemade barbecue sauce.  I always use my recipe for Texas BBQ sauce that I definitely recommend making with this!
☂ After the pork has cooked, pull it out of the slow cooker and shred with two forks.  To make sure the pork isn't dry, moisten it with a few tablespoons of the liquid it cooked in and top it off with the cooked onions and barbecue sauce.
☂ I love to serve this with some tangy vinegar based coleslaw and kettle sea salt and vinegar chips all smothered in homemade barbecue sauce, but feel free to serve it on buns, on pizza, or just on its own.  Whatever your heart desires.
☂ WALAH!  Enjoy and start feeling nourished

Saturday, June 21, 2014

Southwest Corn Salad


One day when I was younger I decided I didn't like corn on the cob.  You see my family has barbecues pretty frequently and growing up we would always have the same thing: a steak, corn on the cob, and a baked potato.  Except for me, I wouldn't have the corn.  I don't know when I decided I didn't like it, but for some weird reason I did.  Up until this past year I still would never eat it because my family never bought it for me knowing that I "didn't like it."  Thinking about it, it's seeming weirder and weirder but I guess after all those years of having it reinforced that I didn't eat corn on the cob, I didn't.  I will state however I ate corn in other things, just not from the cob, it was always canned corn.  That is up until this past year when I tasted corn on the cob and realized how absolutely delicious it was and sweet!  It was a whole different experience than my canned corn and I felt like a fool, a real fool.  Why had I denied this delicious treat for so long.  Anyways now that that has been cleared up, I try to take many opportunities to eat corn from the cob.  This salad is a great way to really highlight the taste and sweetness of the corn.  It is completely a summer salad and is super light and refreshing.  It is freaking fabulous with salmon, but can be served with any protein.  This recipe is definitely a keeper.


S O U T H W E S T  C O R N  S A L A D         R E C I P E

Ingredients
☂ 5 ears of corn (white, yellow, or a mix of both!)
☂ 1 poblano pepper
☂ ½ of a red onion, chopped

dressing
☂ 2 Tbsp. olive oil
☂ 3 Tbsp. apple cider vinegar
☂ ½ tsp. salt
☂ ½ tsp. black pepper
☂ zest of 1 lime
☂ juice of ½ a lime

Directions
☂ Preheat oven to 350 F.  
☂ While the oven is preheating take the ears of corn and pull out any visible corn silk.  Once the oven has preheated place the ears of corn (still inside the husk) directly on the oven rack.  Bake for 30 minutes.
☂ While the corn is cooking whisk together all of the dressing ingredients.
☂ Once the corn is done cooking pull it out of the oven and leave it for a few minutes to cool.
☂ Now put the oven to broil.  Place the poblano pepper in a small baking dish and rub it lightly with olive oil.
☂ Place it into the broiler and char it for 4 minutes on one side and flip it over and char it for 3 minutes on the other side.  Once that has been charred pull it out of the oven and let it sit.
☂ Remove the husk and corn silk from the corn cobs and cut all the kernels into a bowl (If you cut these on a plate or cutting board the kernels will fly everywhere!)
☂ To the bowl add the red onion and the dressing.
☂ Once the poblano has cooled, cut the top off and remove all the seeds.  Mince up the poblano pepper and add it into the bowl with the salad.  Mix the salad so that everything is coated by the dressing.
☂ WALAH!  Enjoy and start feeling nourished